Walkthrough 4-5: Use Anypoint Studio to create a RESTful API interface from a RAML file
In this walkthrough, you generate a RESTful interface from the RAML file. You will:
· Add Anypoint Platform credentials to Anypoint Studio.
· Import an API from Exchange into an Anypoint Studio project.
· Use APIkit to generate a RESTful web service interface from an API.
· Test a web service using APIkit console and Advanced REST Client.
Starting file
If you did not complete the previous walkthrough, you can get a starting file here. This file is also located in the solutions folder of the student files ZIP located in the Course Resources.
Add Anypoint Platform credentials to Anypoint Studio
1. Return to Anypoint Studio.
2. In the Package Explorer, right-click the training4-american-ws project and select Anypoint Platform > Configure Credentials.
3. In the Authentication page of the Preferences dialog box, click the Add button.
4. In the User login dialog box, enter your username and password and click Sign In.

5. On the Authentication page, make sure your username is listed and selected.
6. Click Apply and Close.
Add an API from Exchange to the Anypoint Studio project
7. Right-click the training4-american-ws project and select Manage Dependencies > Manage APIs.
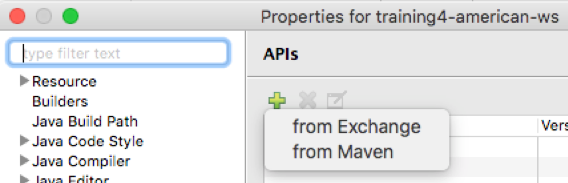
8. In the Properties for training4-american-ws dialog box, click the Add button and select from Exchange.
9. In the Add Dependencies to Project dialog box, enter american in the search field.
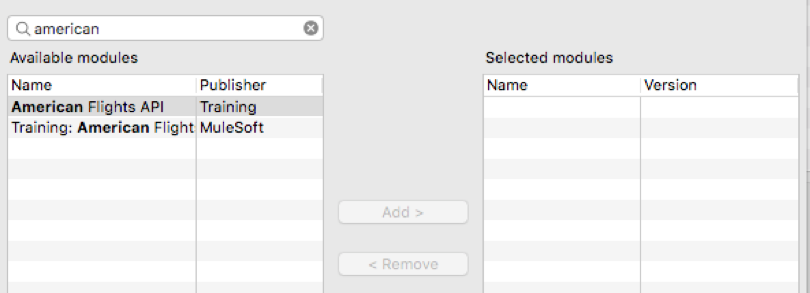
10. Select your American Flights API (not the Training: American Flights API) and click Add.
Note: If you did not successfully create the American Flights API in the first part of the course, you can use the pre-built Training: American Flights API connector.
11. In the selected modules, click American Flights API, then the 1.0.1 version then the version's down-arrow.
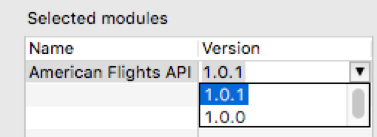
12. Note the list of available versions then select 1.0.1.
Note: If you use the pre-built Training: American Flights API connector, select the latest version.
13. Click Finish.
14. In the Properties for training4-american-ws dialog box, click Apply and Close.
15. Click Yes when prompted to scaffold the American Flights API specification.
Locate the API files added to the project
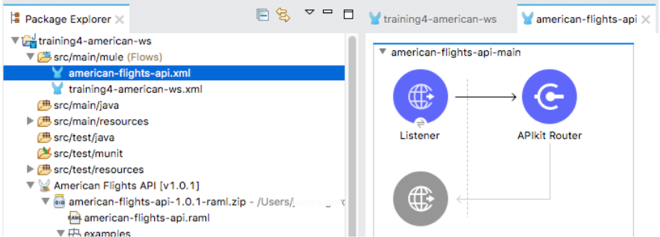
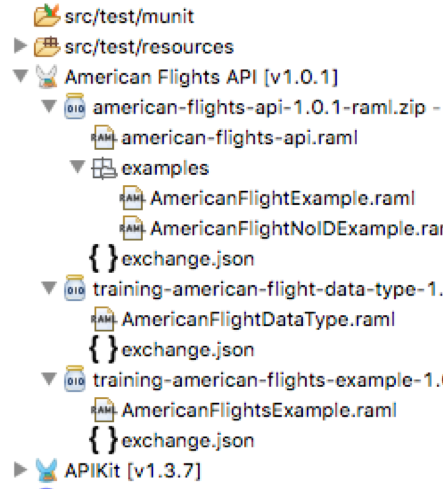
16. In the Package Explorer, locate American Flights API [v1.0.1].
17. Expand the API; you should see the RAML files imported from Exchange.
Examine the XML file created
18. Examine the generated american-flights-api.xml file and locate the following four flows:
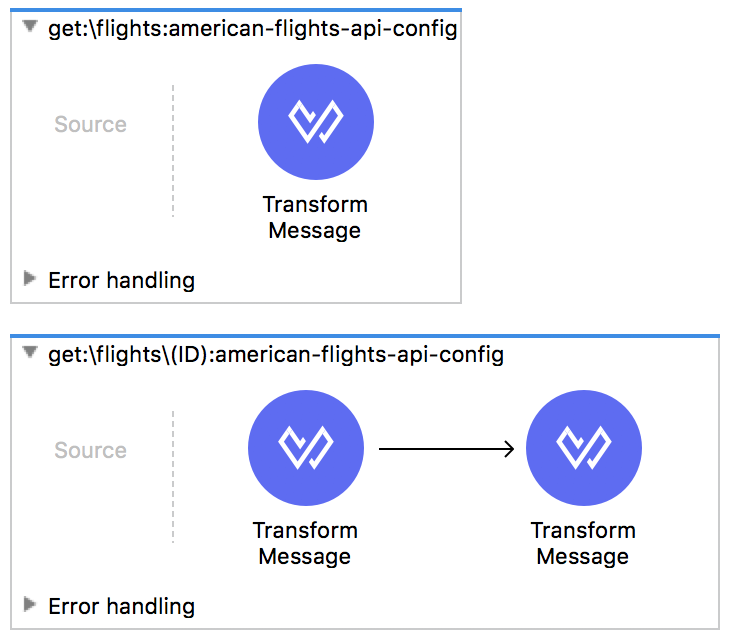
· delete:/flights/{ID}
· get:/flights
· get:/flights/{ID}
· post:/flights
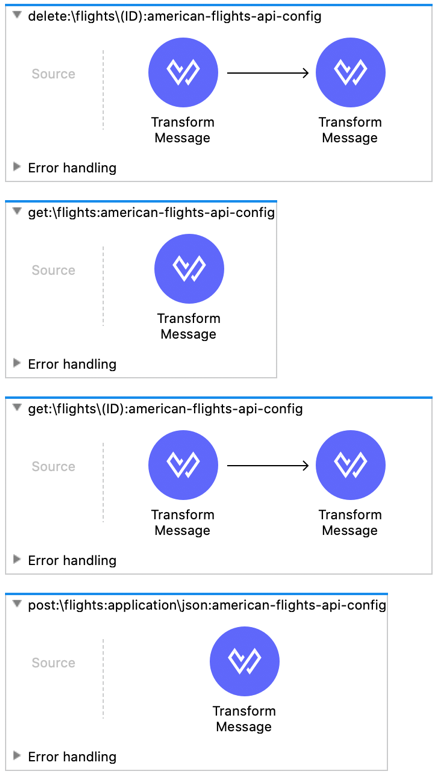
19. In the get:/flights/{ID} flow, double-click the second Transform Message component and look at the output JSON in the properties view.
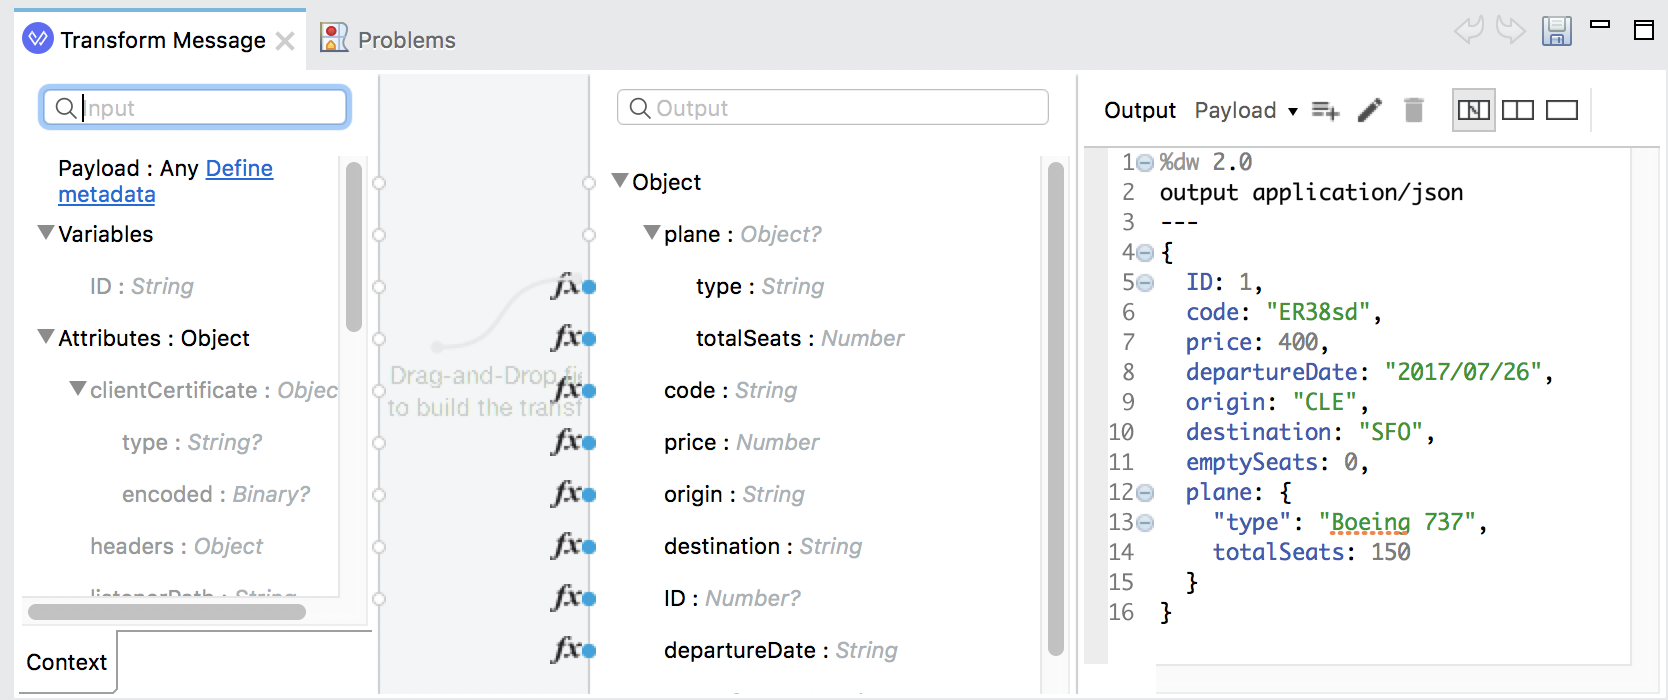
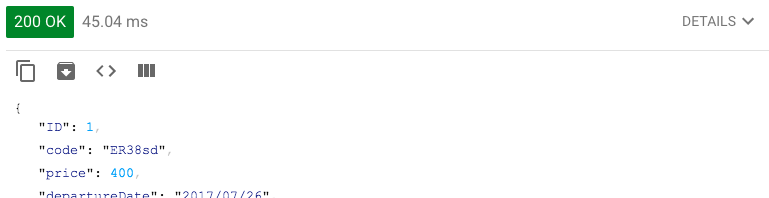
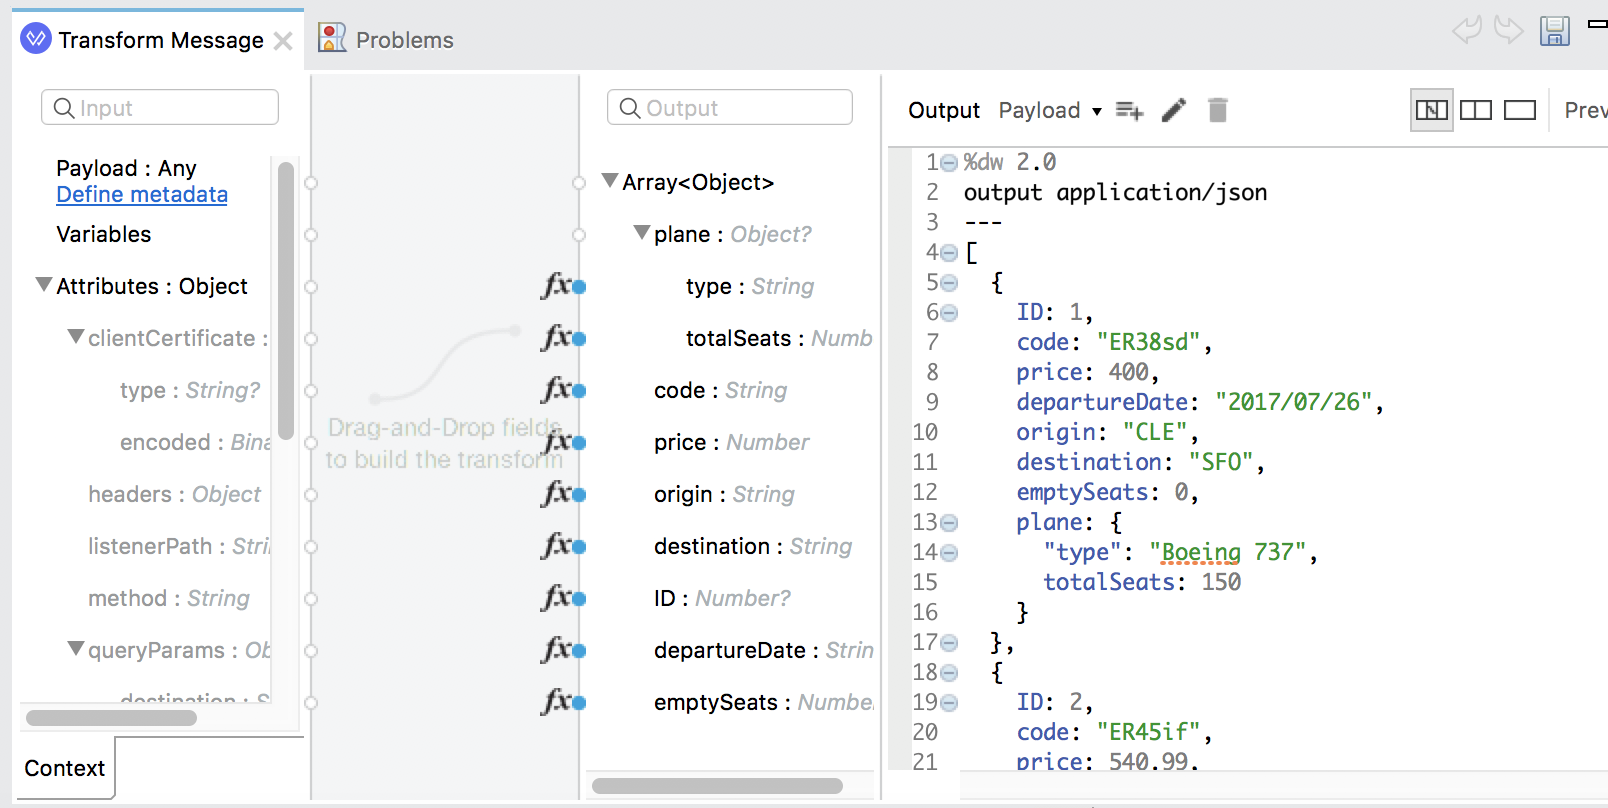
20. In the get:/flights flow, double-click the Transform Message component and look at the output JSON in the properties view.
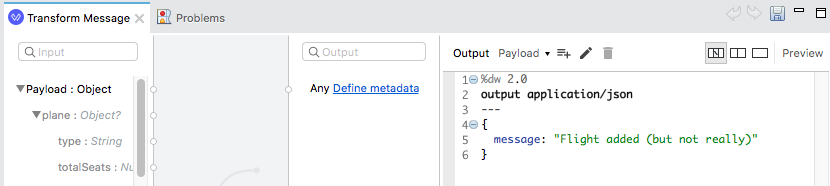
21. In the post:/flights flow, double-click the Transform Message component and look at the output JSON in the properties view.
Examine the main flow and its HTTP Listener
22. Locate the american-flights-api-main flow.
23. Double-click its HTTP Listener.
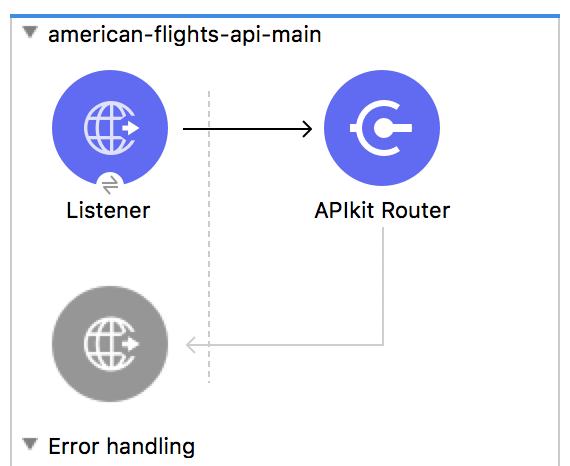
24. In the Listener properties view, notice that the connector configuration is the existing HTTP_Listener_config and that path is set to /api/*.
Note: The * is a wildcard allowing any characters to be entered after /api/.
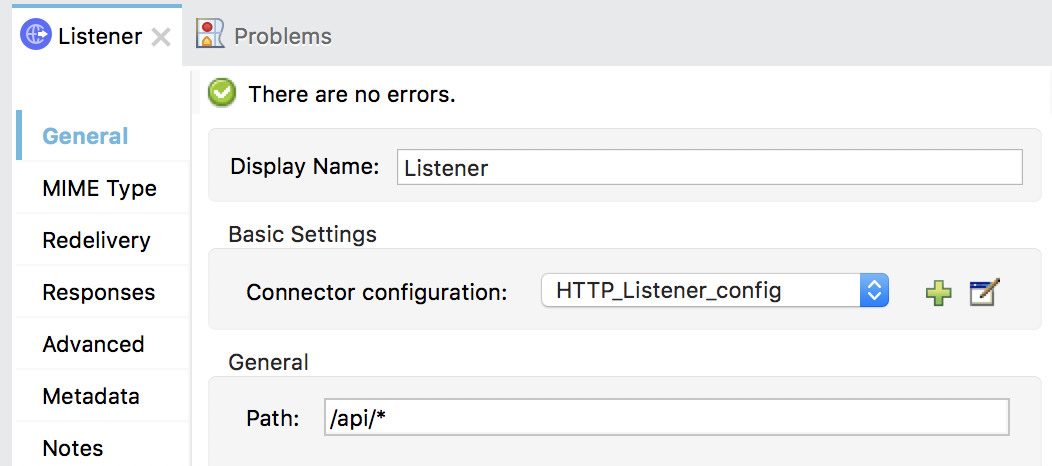
25. Click the Edit button for the connector configuration; you should see that the same port 8081 is used as the HTTP Listener you created previously.
26. Click Cancel.
Remove the other listeners
27. Return to training4-american-ws.xml.
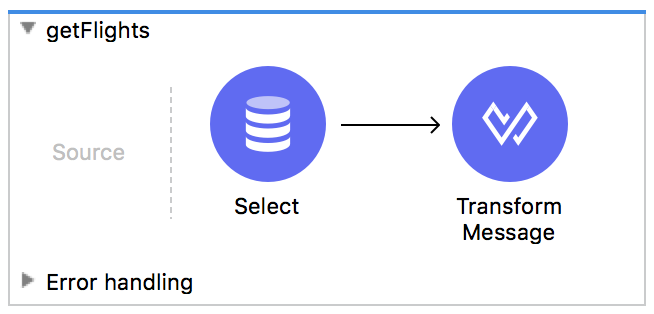
28. In the Message Flow view, right-click the HTTP Listener in getFlights and select Delete.
29. Delete the other two HTTP Listeners.
Test the web service using APIkit console
30. Save the files.
31. Locate the new APIkit Consoles view that is created and opened in Anypoint Studio and note that there is no data to display.

32. Stop the project.
33. Run the project and wait until Mule and the application restart.
34. Verify that the APIkit Consoles view is now populated.

35. Click the Open console button; a browser window should be open with an API console.
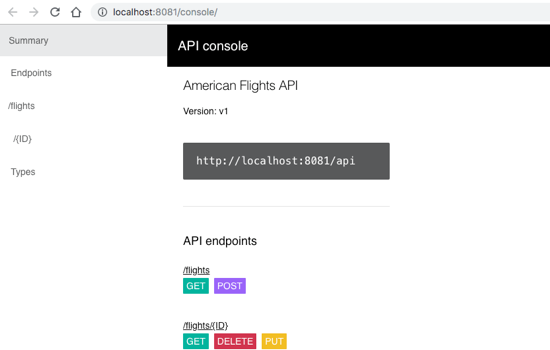
36. Select the GET method for /flights.
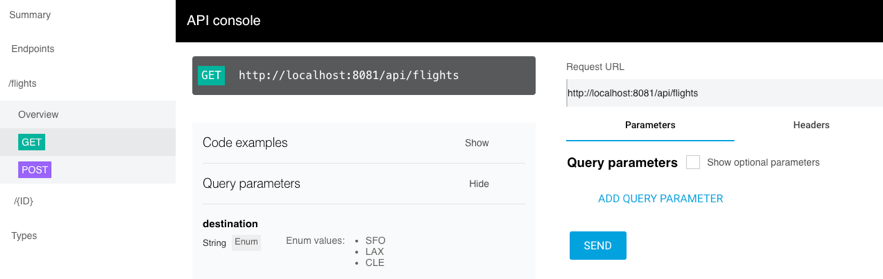
37. Click Send; you should get a 200 response with the example flight data – not all the flights.
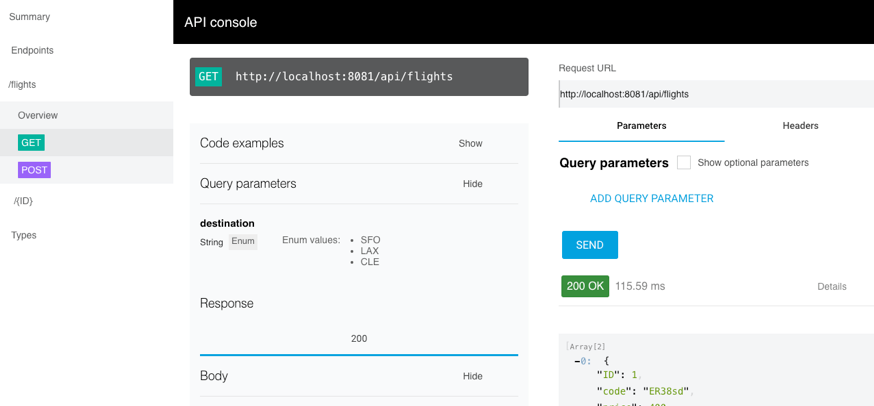
Note: If you use the pre-built Training: American Flights API connector, you must enter any values for client_id and client_secret on the Headers tab.
38. Close the browser window.
Test the web service using Advanced REST Client
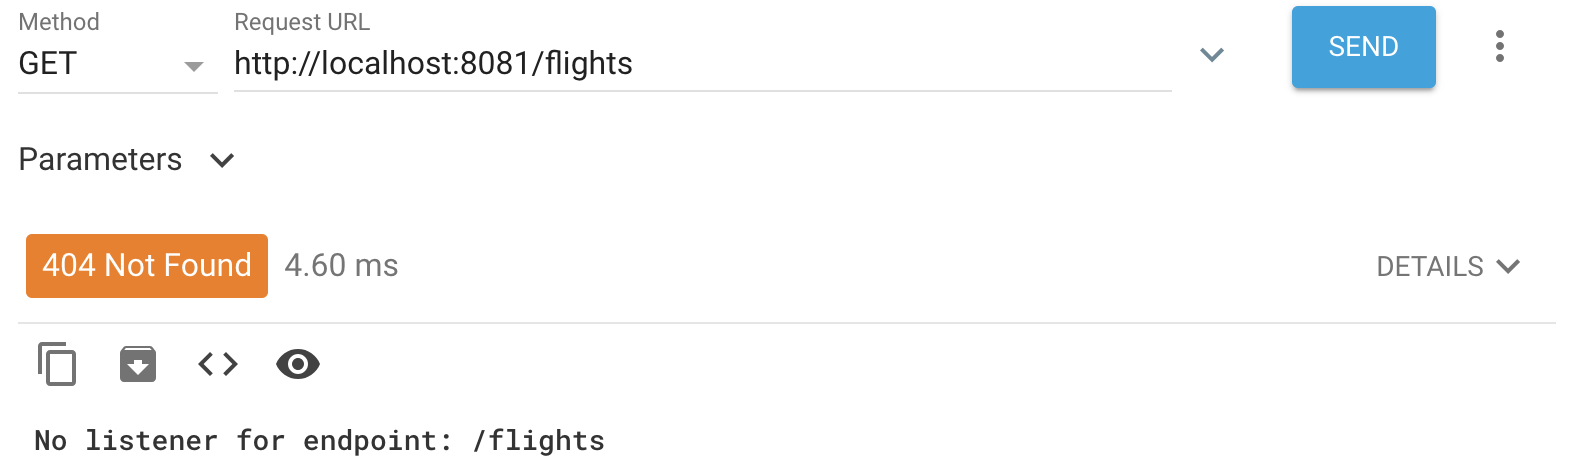
39. Return to Advanced REST Client.
40. Change the method to GET and click Send to make a request to http://localhost:8081/flights; you should get a 404 Not Found response.
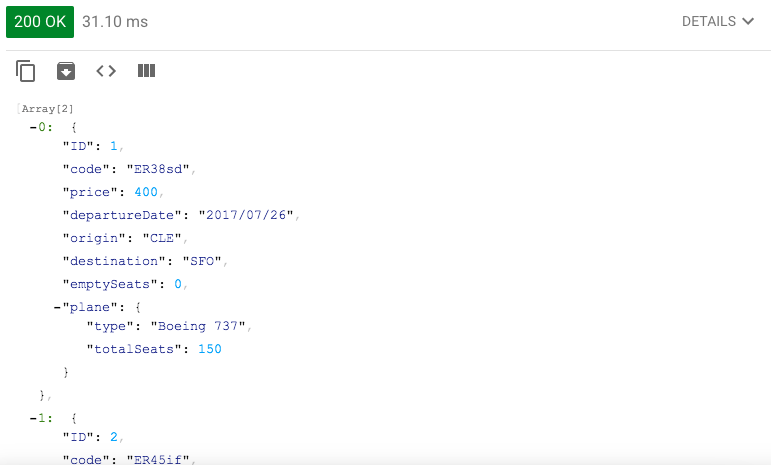
41. Change the URL to http://localhost:8081/api/flights and send the request; you should get a 200 response with the example flight data.
Note: If you use the pre-built Training: American Flights API connector, you must add client_id and client_secret headers with any values.
42. Make a request to http://localhost:8081/api/flights/3; you should see the example data returned for a flight with an ID of 1.